How to pin your insect specimens
What Pins Should You Use?
Insects should be pinned in a uniform manner using pins made especially for this purpose. Obtain insect pins from a biological supply house or company that specializes in entomology and collecting insect specimens. I recommend our website www.insects4sale.com. Do not use common straight pins since they will rust and soon ruin what may be valuable specimens. The brands I prefer are Ento-sphinx insect pins and Entochrysis insect pins. I use black enamel but pins are available in stainless steel as well. Pins come in 10 sizes as listed below:
- size 000
- size 00
- size 0
- size 1
- size 2
- size 3
- size 4
- size 5
- size 6
- size 7
I have found that sizes 0, 1, 2 and 3 are needed for most average sized insect specimens. I use size 7 for thick bodied insects such as the Hercules Beetle or Giant Silkworm Moths.
Specimens should be Fresh or relaxed for Pinning
It is the easiest to pin insect specimens within a day of being killed when they are still fresh. Insects left to dry for longer will need to be relaxed before pinning to avoid breaking appendages. I use Ammonium hydroxide to relax most insect specimens except for Lepidoptera. Ammonium hydroxide can be purchased in convenient 2oz bottles with instruction on our website www.Insects4Sale.com under the item name Appendage Relaxing Fluid. Lepidoptera can be relaxed with simple to follow instructions outline in ‘Relaxing you Butterfly or Moth Specimen’ available on the website or included with the purchase of most Butterfly or Moth dried and papered specimens.
How to insert the Pin
The best place to insert the pin through the specimen depends largely on the body type or scientific Order of the insect being pinned. Image 1a show 5 of the major body types with a dot indicating where to place the pin.
 image 1a
Piercing the pin through the insect in the correct location will avoid damage to appendages as the pin exits the opposite side of the insect’s body. The insect should also be parallel to the pinning surface and at a 9-degree angle to the pin. The back or top side of the insect should be about 4mm from the top of the pin allowing room to grab the pinned specimen with your fingers or pinning forceps without damaging the specimen or changing its position on the shaft of the pin. Image 1b shows the correct way to insert the pin and several wrong ways to do so.
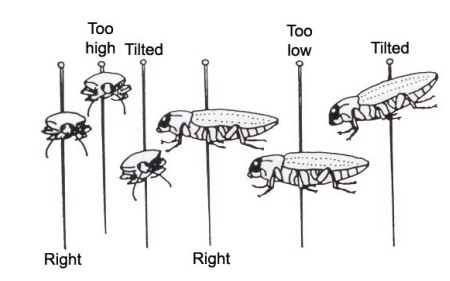 image 1b: examples of right and wrong way to pin insects
Labeling your Pinned Specimen
Now that you have pinned your insect specimen it is time to insert the labels on the pinned specimen. Neatness counts and I have found it best to use a pinning block to place the specimen and labels evenly and uniformly on the pin. Image 1c shows a pinning block available through the website.
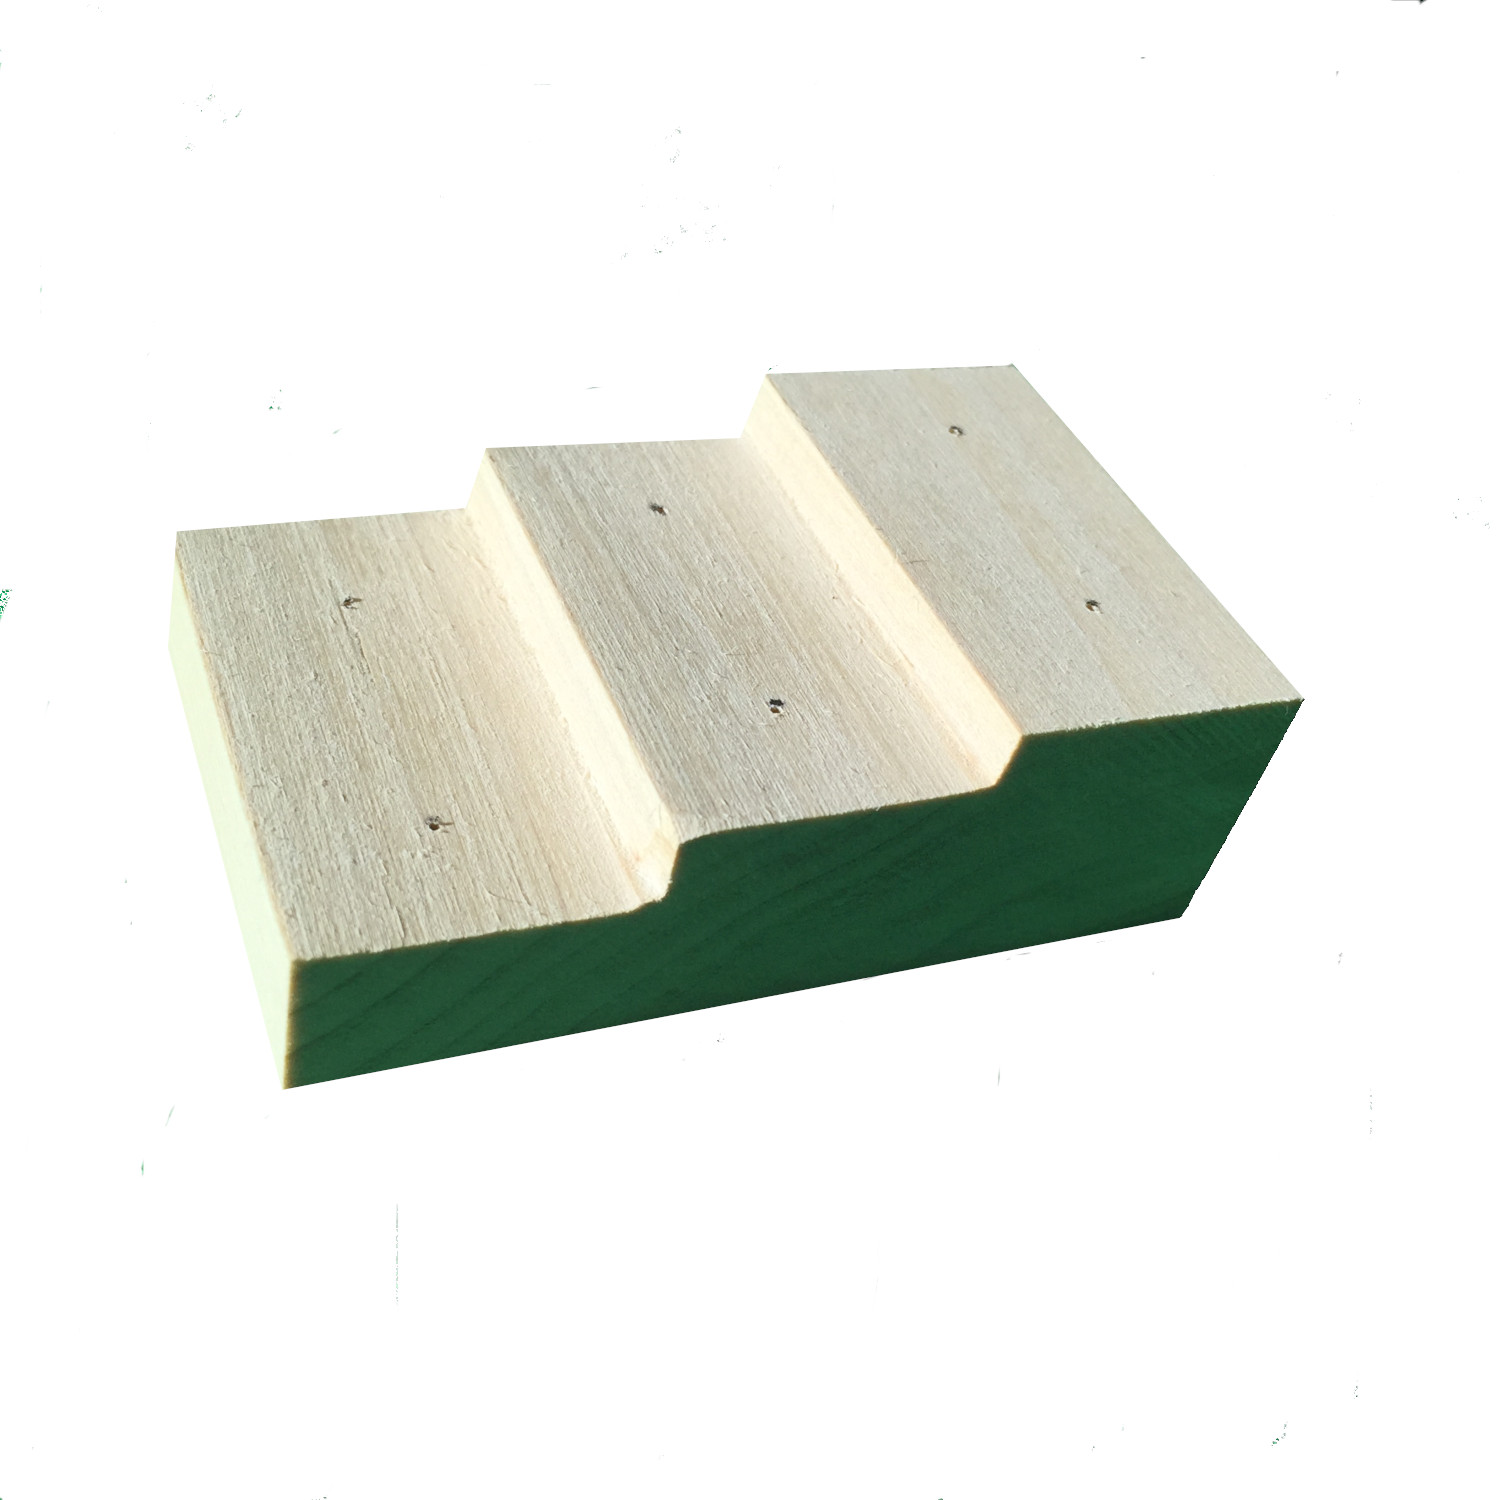 image 1c: insect pinning block
The pictured pinning block makes room for up to 3 labels on the shaft of the pin. Data recorded on the label and the size of the label can vary with the purpose of the collection. A collection for a 4H project might have very different requirements
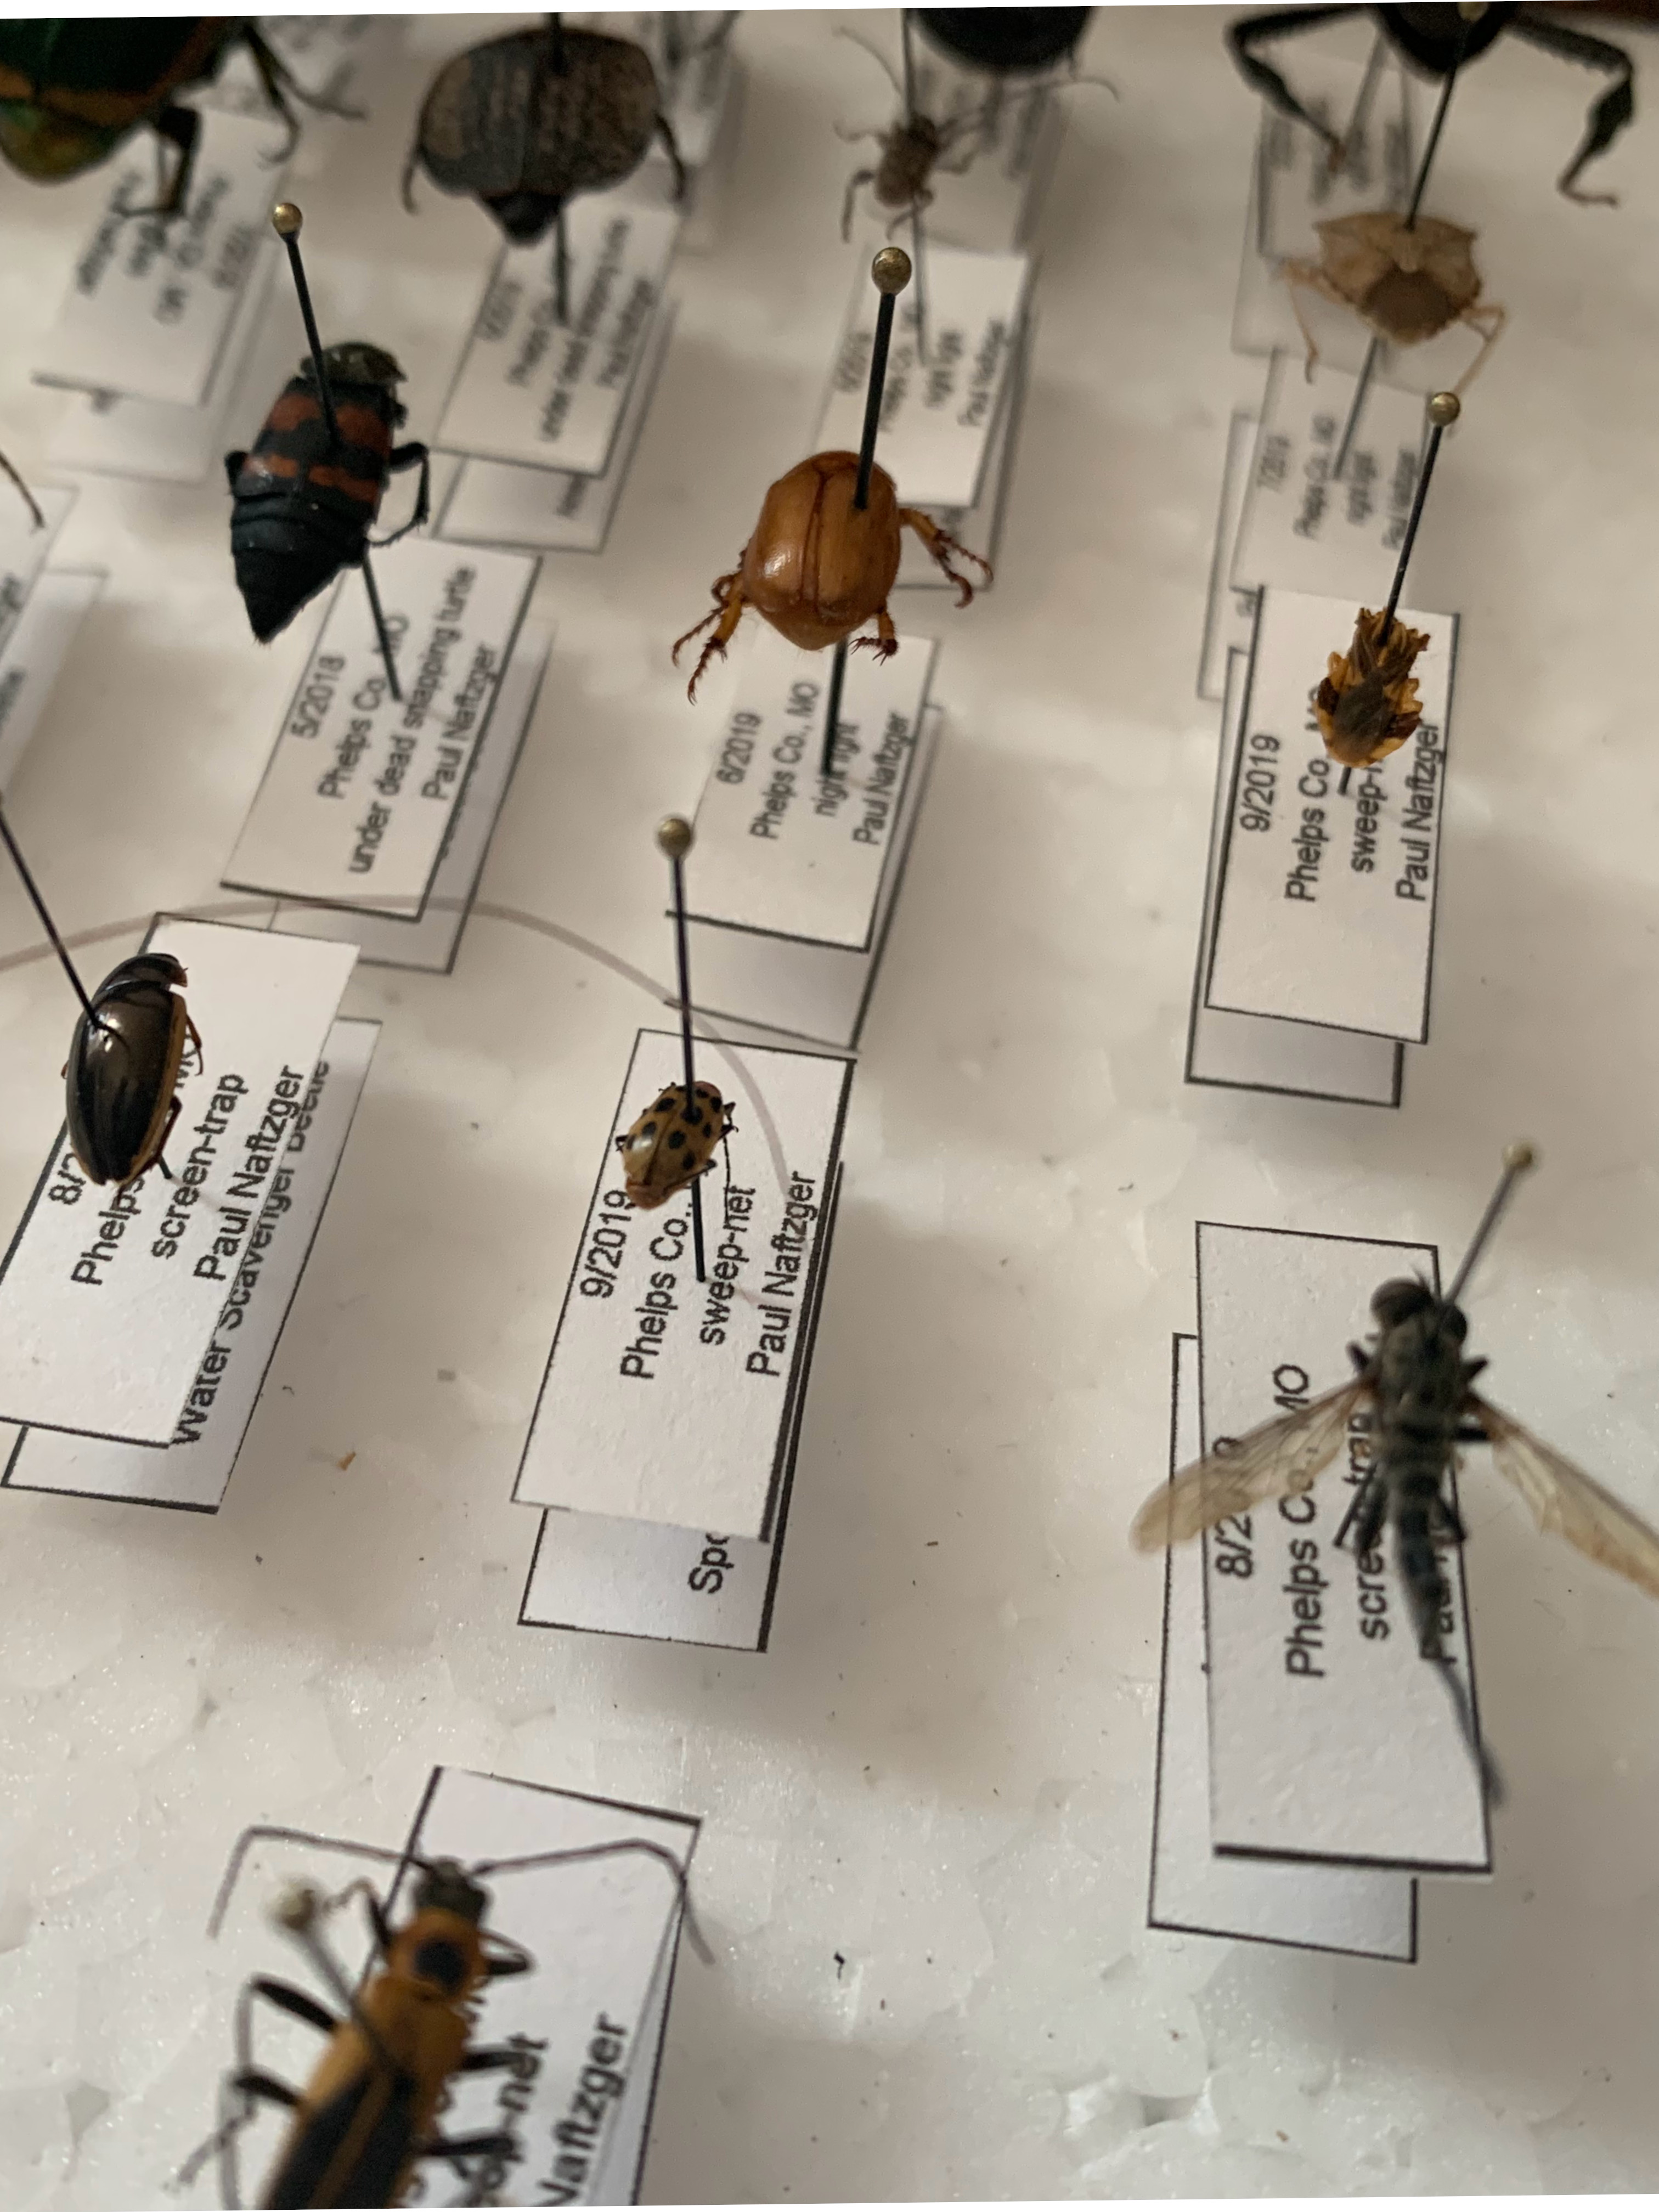 image 1d: orientation
than that of a high school biology class, a collage level entomology class or a hobbyist collection. Image 1d shows the position and orientation of the specimen and labels that I prefer for my
insect collection.
For specimens too small to pin
Pinning very small insect specimens can be tricky. One popular method is the use of small triangular points made of card stock paper. A small specimen like a mosquito or a flea is glued to the tip of the triangular piece and the pin is pierced through the base as shone in image 1e. I do not prefer the pinning point method as it leaves the underside of the specimen not visible and forever stuck in glue. I prefer the use of gelcaps.
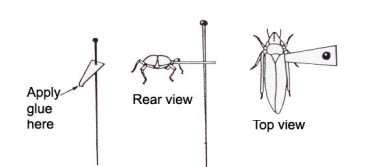 image 1e: pinning point
GelCaps are clear capsules made of a dry gel. The capsules may be opened and its specimen removed. The specimen may be later placed back into the gelcap and the gelcap can be closed for retrieval at a later time.
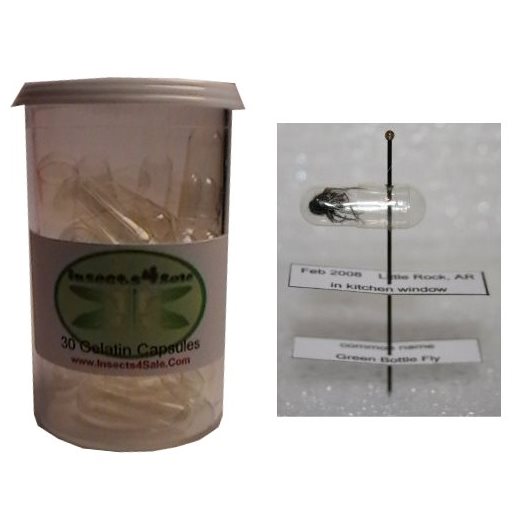 image 1f: gelcap pin-mounting
The best part is the clear capsule may be pinned through without ever touching the tine and delicate specimen. A collector can remove the tiny specimen, examine it under a dissecting microscope and then replace it and return it to the collection. Keep in mind that most teachers resist change and prefer the pinning point method developed sometime in the 1800’s.